
 English
You can manage DNS zones under DNS Functions in WHM (Web Host Manager). This area is for advanced users only, so please feel welcome to request any DNS zone changes by contacting us via our phone line +234 901 729 2738 or Live Chat.
Understanding DNS Zones
The function of your name servers is to locate the server and the correct DNS zone to get the following information:
1. A Record - It points your domain or subdomain to an IP address (e.g., mydomain.com -> 123.456.78.9 (IP address))
2. CNAME Record - This points your domain or subdomain to another domain name (e.g., www.domain.com -> domain.com)
3. MX Records - They control where your emails are received. If you want your mail hosted on another server, this is what you will need to change (e.g., domain.com -> server. ext).
4. NS Records - These must match the name servers you are using.
How To Change NS Records When Using Private Name Servers
If you are using private name servers and would like to change your NS records, follow the steps below.
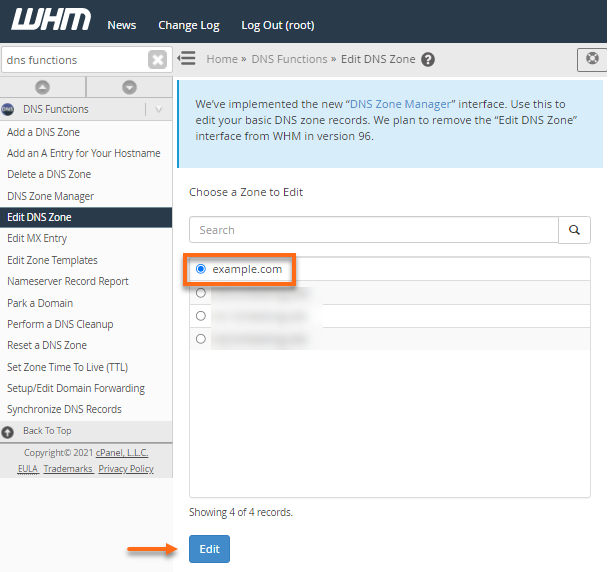
1. Log in to WHM.
2. In the left menu, search for DNS Functions.

3. Click Edit DNS Zone.

4. Select your domain name, then click on the Edit button.
5. Look to the right of SOA and replace the name server with your primary private name server (be sure to include the trailing dot for ns1).

6. Look to the right of NS and replace each name server with your private name servers (be sure to include each trailing dot for ns1 and ns2).
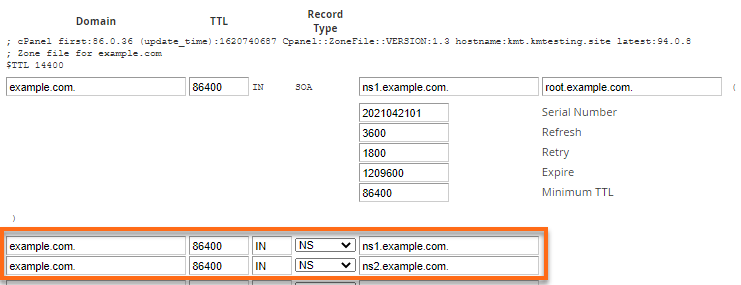
7. Scroll down and click the Save button
How To Change the MX Records in WHM
To point the MX records to either a remote or local server:
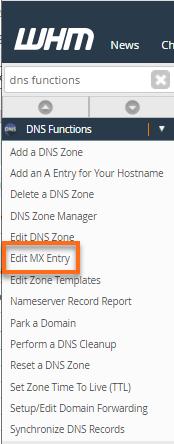
1. Log in to WHM.
2. Under the DNS Functions section, click Edit MX Entry.
3. Select the domain you wish to update, then click Edit.
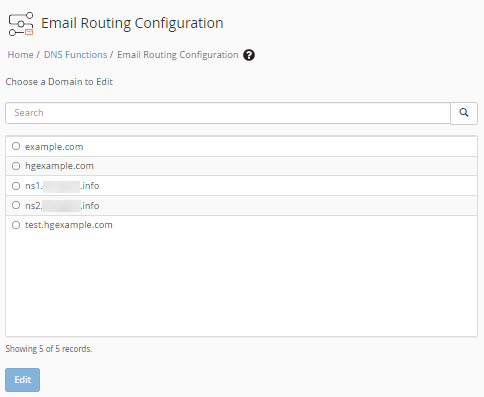
4. Select the email delivery method – Local, Backup, or Remote Mail Exchangers.
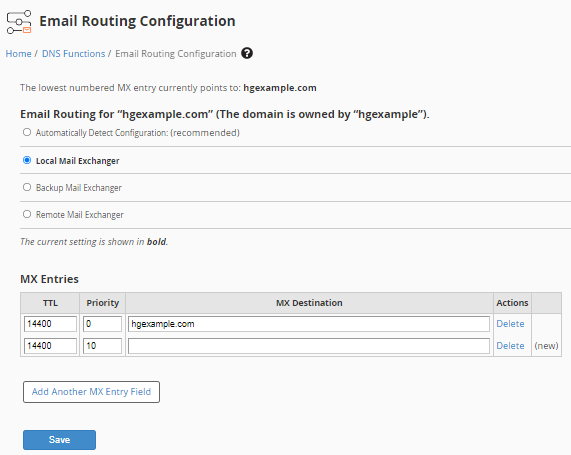
5. Enter your preferred MX destination (MX records). Please visit this article to know more about MX records.
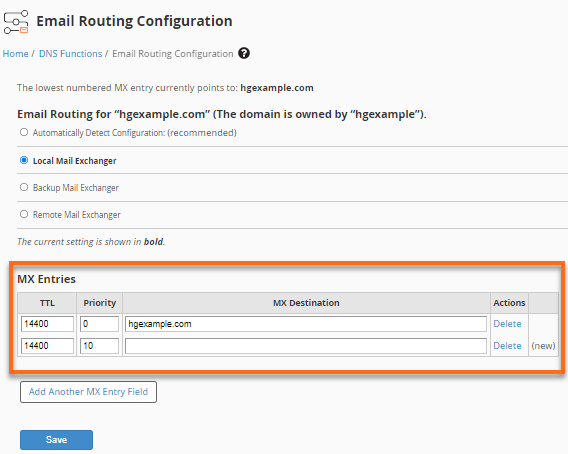
6. Once done, click Save.

