English
With cPanel, users are granted access to make some DNS changes from within the control panel. Please note that this effect will only work if Walex Biz Host's name servers or private name servers registered with Walex Biz Host IPs are being used.
DNS Zone Functions
The following information will assist you in understanding the purpose of each DNS zone.
- Name Servers assist in finding the server and correct DNS zone for a domain to get the information on the other DNS zone records.
- NS Records listed in the DNS zone must match the name servers being used.
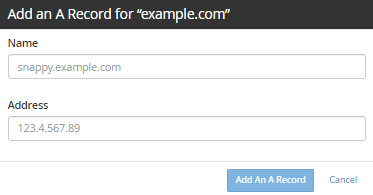
- A Records point the domain to an IP address (e.g., mydomain.com -> IP address).
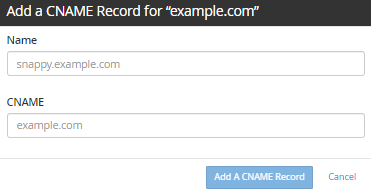
- CNAME Records point subdomains to another domain name like www and mail. (e.g. www.domain.com -> domain.com).
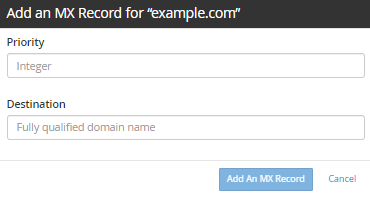
- MX Records control where emails are received. If the mail is to be hosted on another server, then the MX records need to be changed. (e.g. domain.com -> mail server).
- TXT records are custom records that contain machine-readable data. TXT records must be formatted according to whichever technology you are trying to use.
For more information on the purpose and use for each DNS record, please refer to the following article:
- What is DNS?
1. Log in to cPanel.
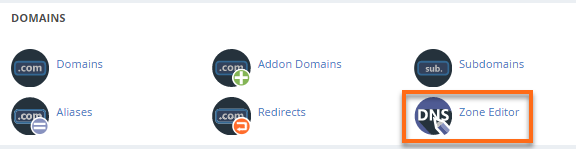
2. Look for the Domains section, click Zone Editor.
3. On the next page, locate the domain name you need to edit.

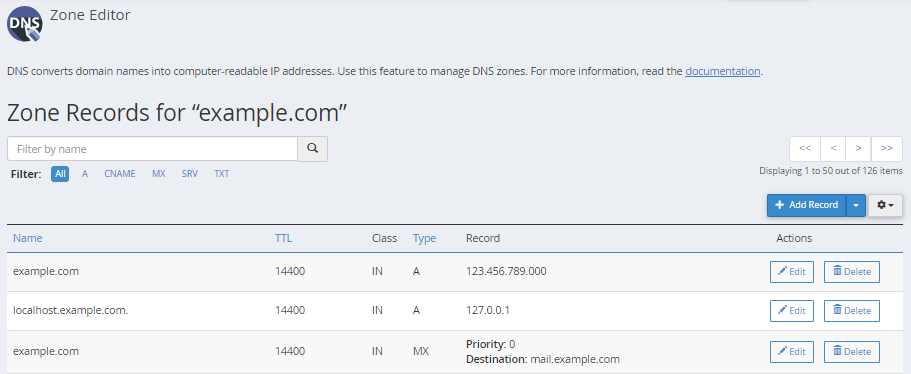
4. Click Manage to view the domain's complete set of DNS records.
5. Locate the DNS record you wish to update.
6. Make the necessary updates.
a. Select Edit to update the DNS record, then click Save Record.
b. Click on the Delete button to remove a DNS record. A confirmation popup will appear. Click Continue.
How To Add A, CNAME, or MX Records
There are two ways to add a new DNS record:
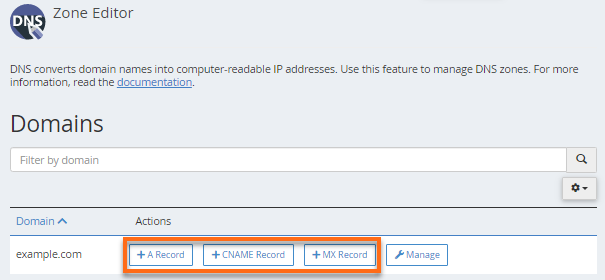
Option 1:
Click the appropriate + button in the Zone Editor section and provide the necessary details.
This applies only to A, CNAME, and MX records.
A Record
CNAME Record
MX Record
Option 2:
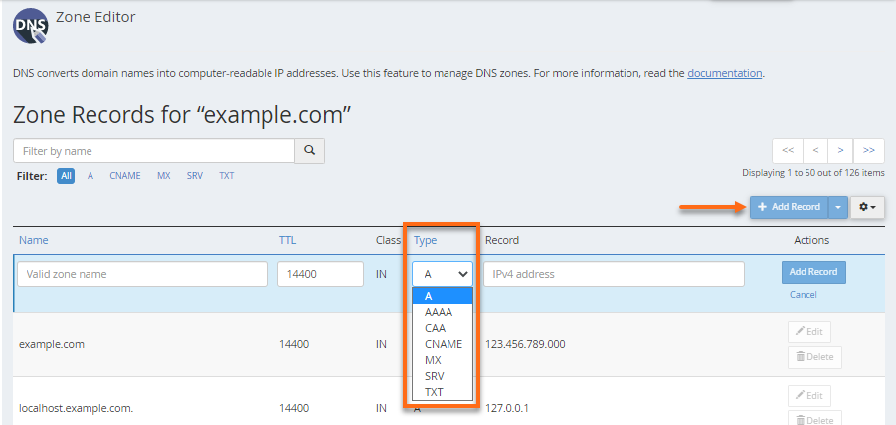
Click the +Add Record button. Once the DNS Type is selected, enter the necessary details to complete, then click Add Record.
For this method, aside from the A, CNAME, and MX, you can also add an AAAA, SRV, and TXT record.