
 English
Also known as a landing page or an under-construction page, a one-page site is a perfect solution for a temporary placeholder. The site tells visitors that your real site is coming soon and lists any vital information. Typically, you will include contact and order information useful for offline contact (i.e., phone number, mailing address, email).
How To Create a Temporary Page
The easiest option is to use the File Manager found in your control panel. While these instructions are for Shared and Reseller accounts, similar steps can be used with any hosting plan
1. Log in to cPanel.
2. Click on the File Manager icon.
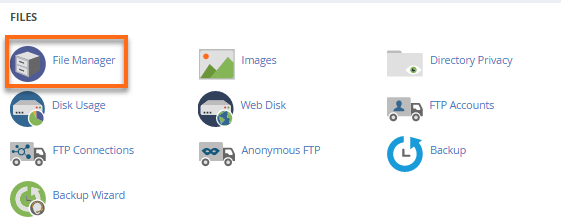
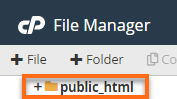
3. On the left pane of the File Manager, click on the public_html folder.

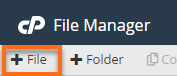
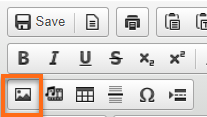
4. Go to the top menu on the page and click the + File icon.
5. For the new file name, type "index.html" (without the quotation marks)
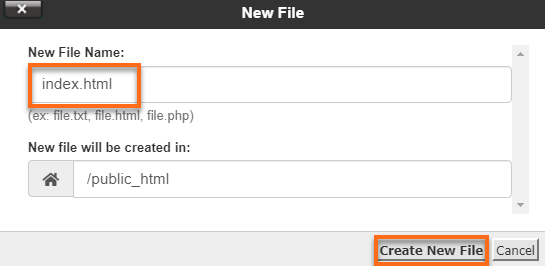
6. Click the Create New File button.
7. Look for the new file you created in the main list.
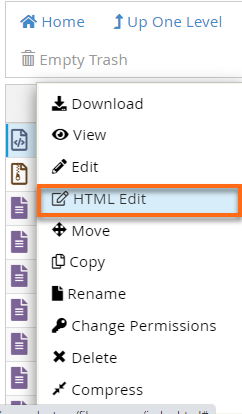
8. Right-click the icon for index.html and choose the HTML Edit option from the dropdown.
9. Another pop-up box will appear showing the URL for the temporary site.

The page that appears will allow you to have a WYSIWYG editor, making web design seem simple.
To remove the page, delete the file that was created in the previous steps. The file can also be replaced with a new version with the same file name instead.
How To Add Images to the Temporary Page
To add images to your WYSIWYG page:
1. Log in to cPanel.
2. Click on the File Manager icon.

3. On the left pane of the File Manager, click on the public_html folder.
4. Go to the top menu on the page and click the Upload icon.

5. On the new window, click the Select File button to locate the images on the local machine.
6. Double-click the image when found, and wait for the green bar to reach 100% Complete.
7. Click the Back to /home/your-user-name/public_html link. The image file will now appear along with your index.html file.
8. Go back to the HTML Edit tool. (Follow Step 8 from How To Create a Temporary Page above.)
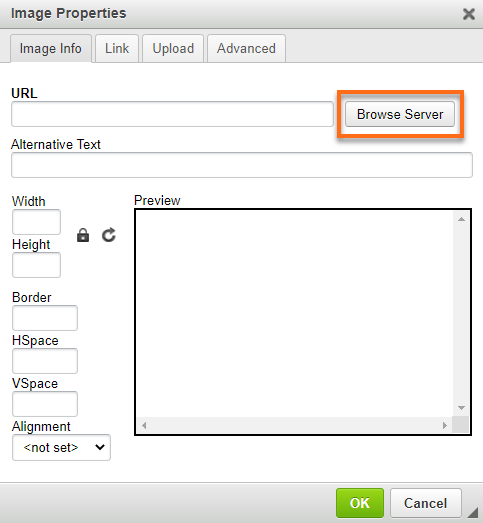
9. Click the Image icon.
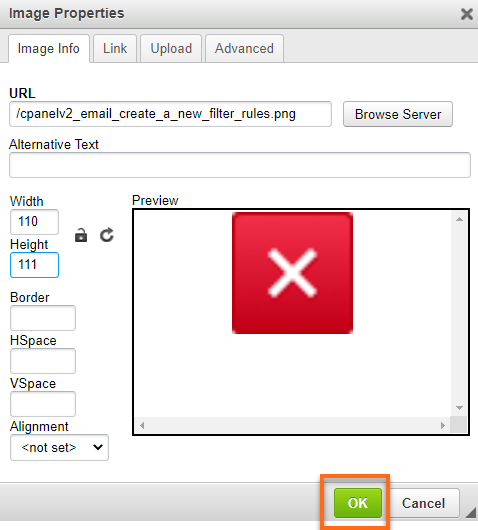
10. A pop-up box will appear with options for managing the image you wish to include. Please click Browse Server to select an image stored on the server:
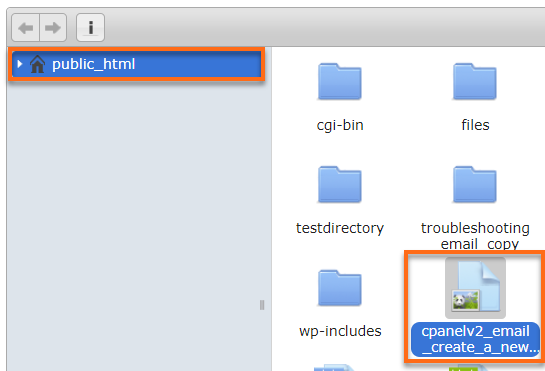
11. A new window will pop up. Use the navigation menus to browse to the location where the image you wish to use is saved, then double-click the image file.
12. You will be returned to the original pop-up box. From here, you may select options such as changing the dimensions of the image. When you are done choosing additional options for your image, please click OK.
13. Go to the top left of the editor and click the Save icon.
14. Preview your site by using the URL selected for the temporary web page. Make changes as needed.
